- Introduction
- The Basics
- Compatibility with older iOS versions
- How to screenshot with inverted color settings
- Conclusion
Introduction
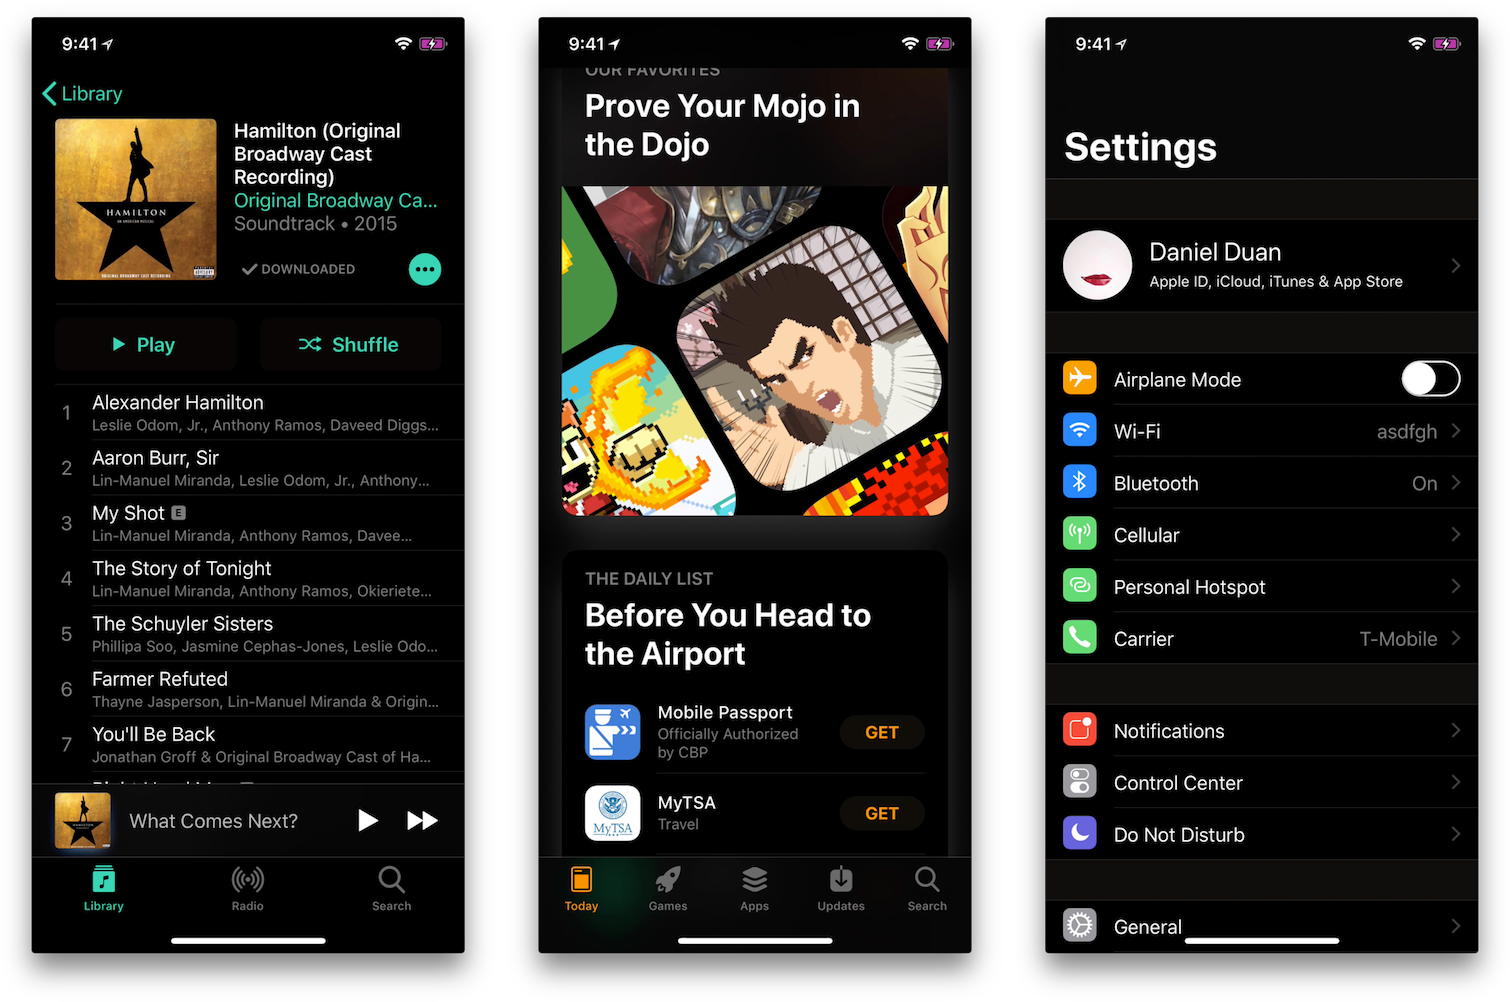
Apple sneakily shipped a "dark mode" in iOS 11, native apps looks gorgeous in this mode (especially on iPhone X with it's OLED display):
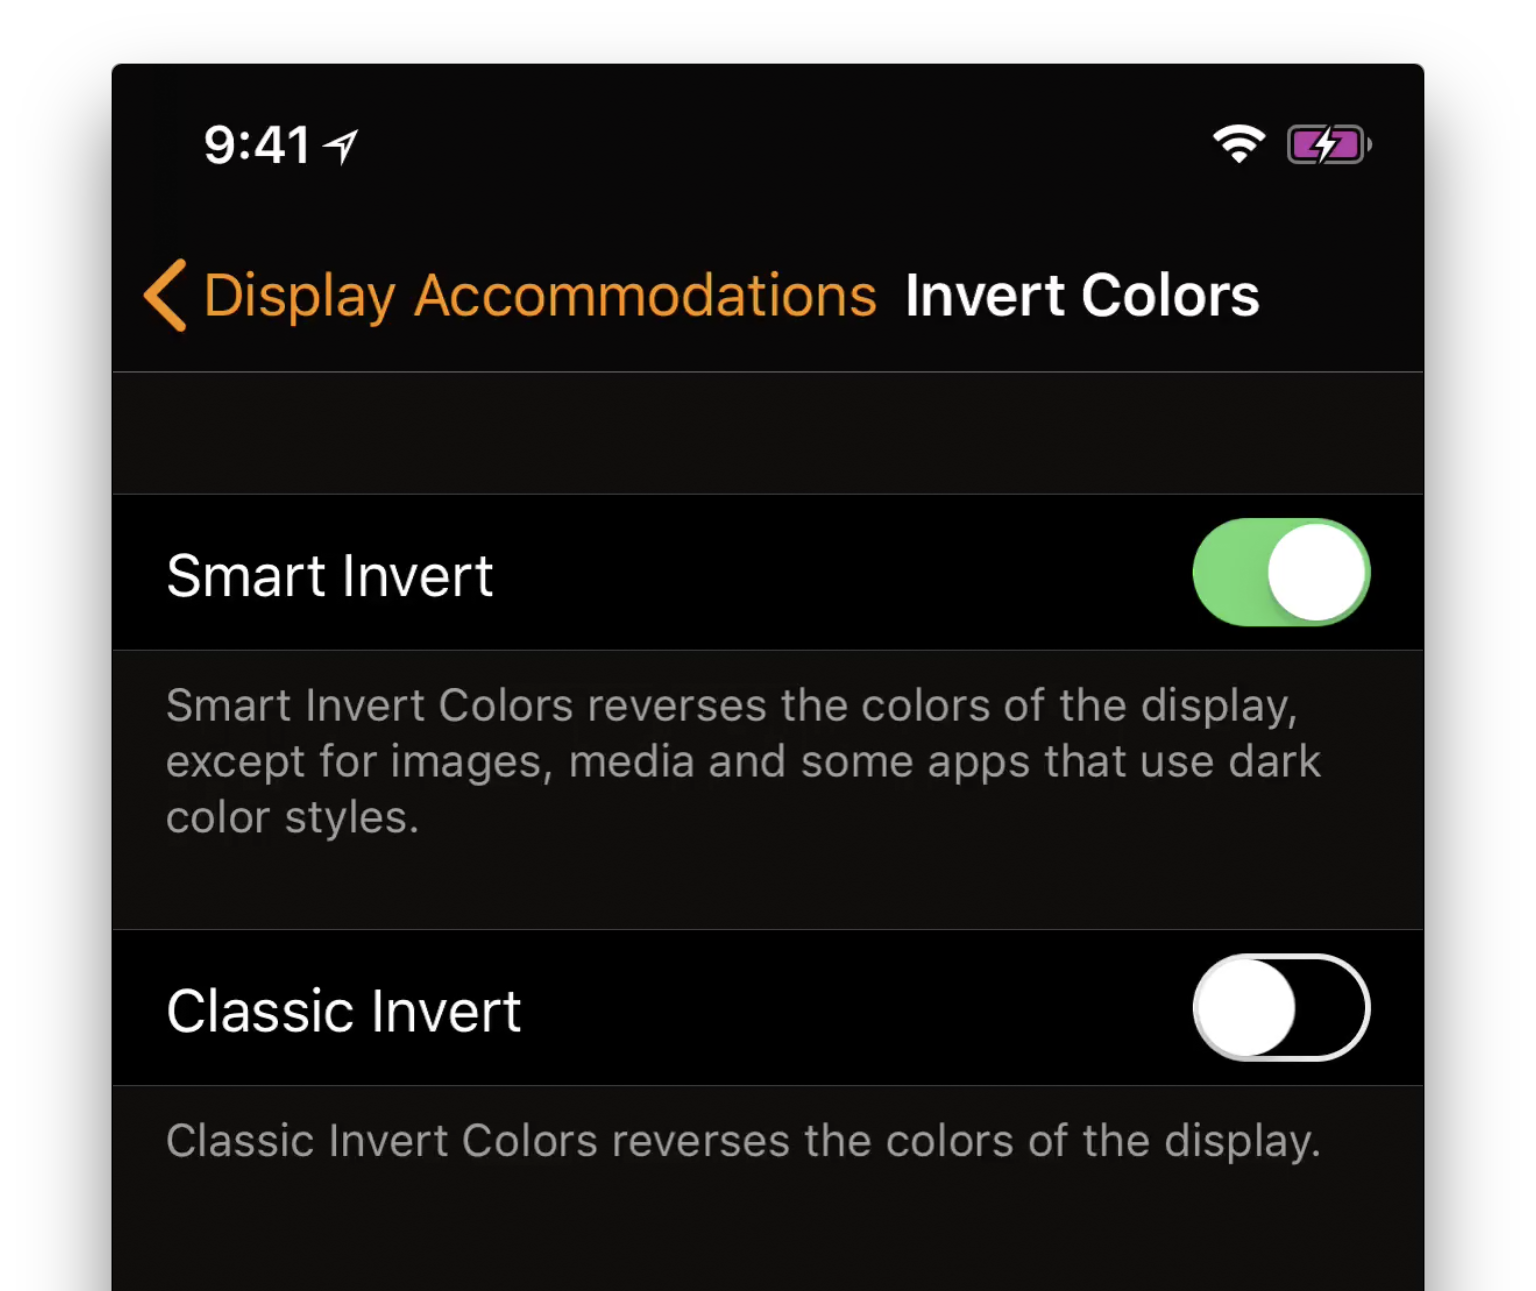
To see it for yourself, go to Settings -> General -> Accessibility Display Accommodations -> Invert Colors and toggle the switch to on (I personally set triple tap of the power buttton to toggle this on/off):
Note that in Apple's first-party apps, not every view's color is inverted (hence, "smart"). For apps that we built, that would not be the case automatically. Instead, we get the full color inversion under this setting:
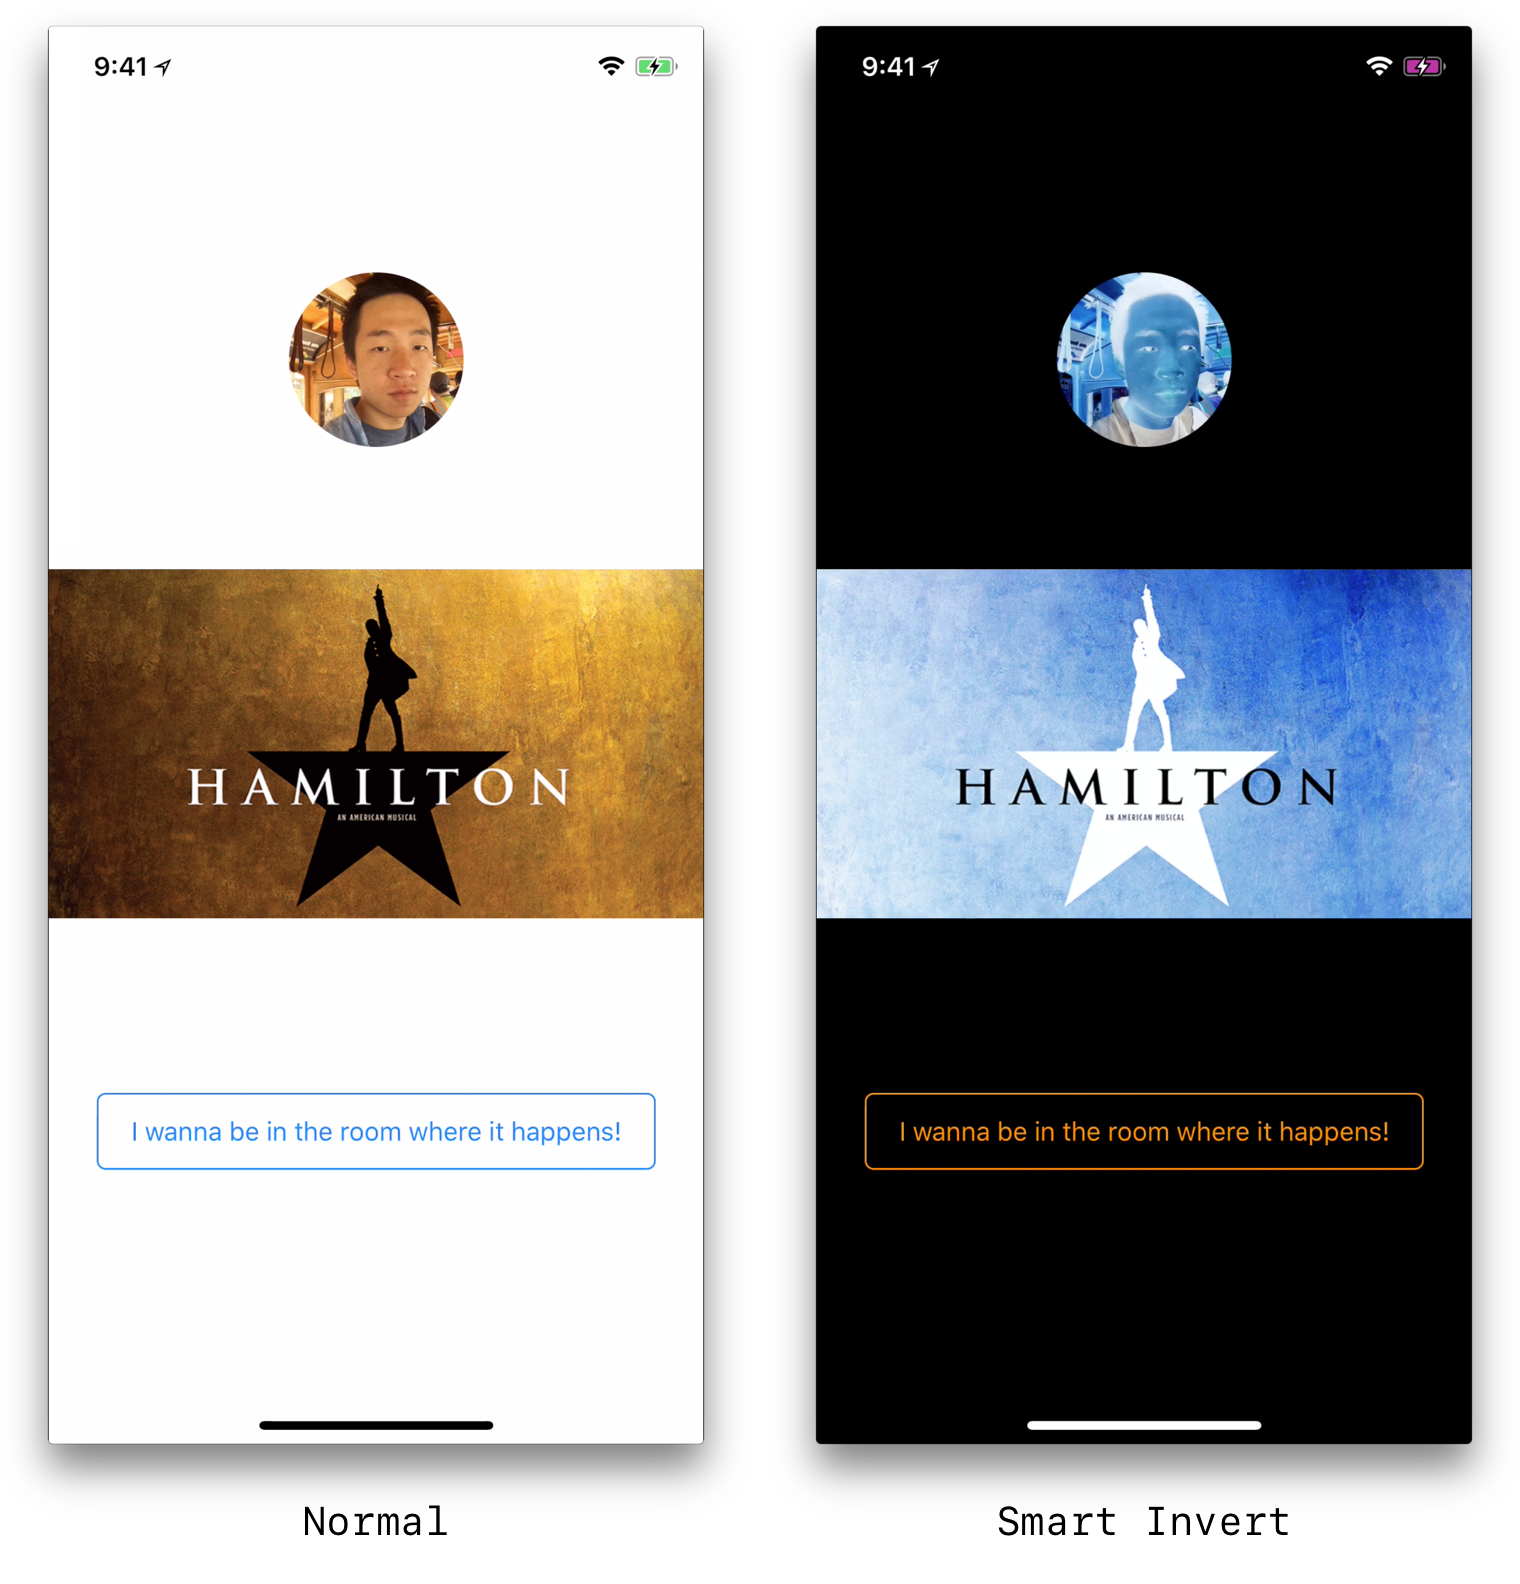
In this article, we'll see how to best adapt our apps so they look just as good as first-party iOS apps under the smart invert setting.
The Basics
TL;DR: use accessibilityIgnoresInvertColors on your UIViews to prevent their color to be
inverted.
iOS 11 introduced accessibilityIgnoresInvertColors, a property on UIView. From the offical
documentation:
If inverting the colors would have a negative impact on your view's content, set this property to true to prevent it from inverting its colors. Setting the property to true prevents the system from inverting the colors of the view and all of its subviews.
So, for views containing photos or videos with real-world content, we probably want to set it to true. In
our sample app's source code:
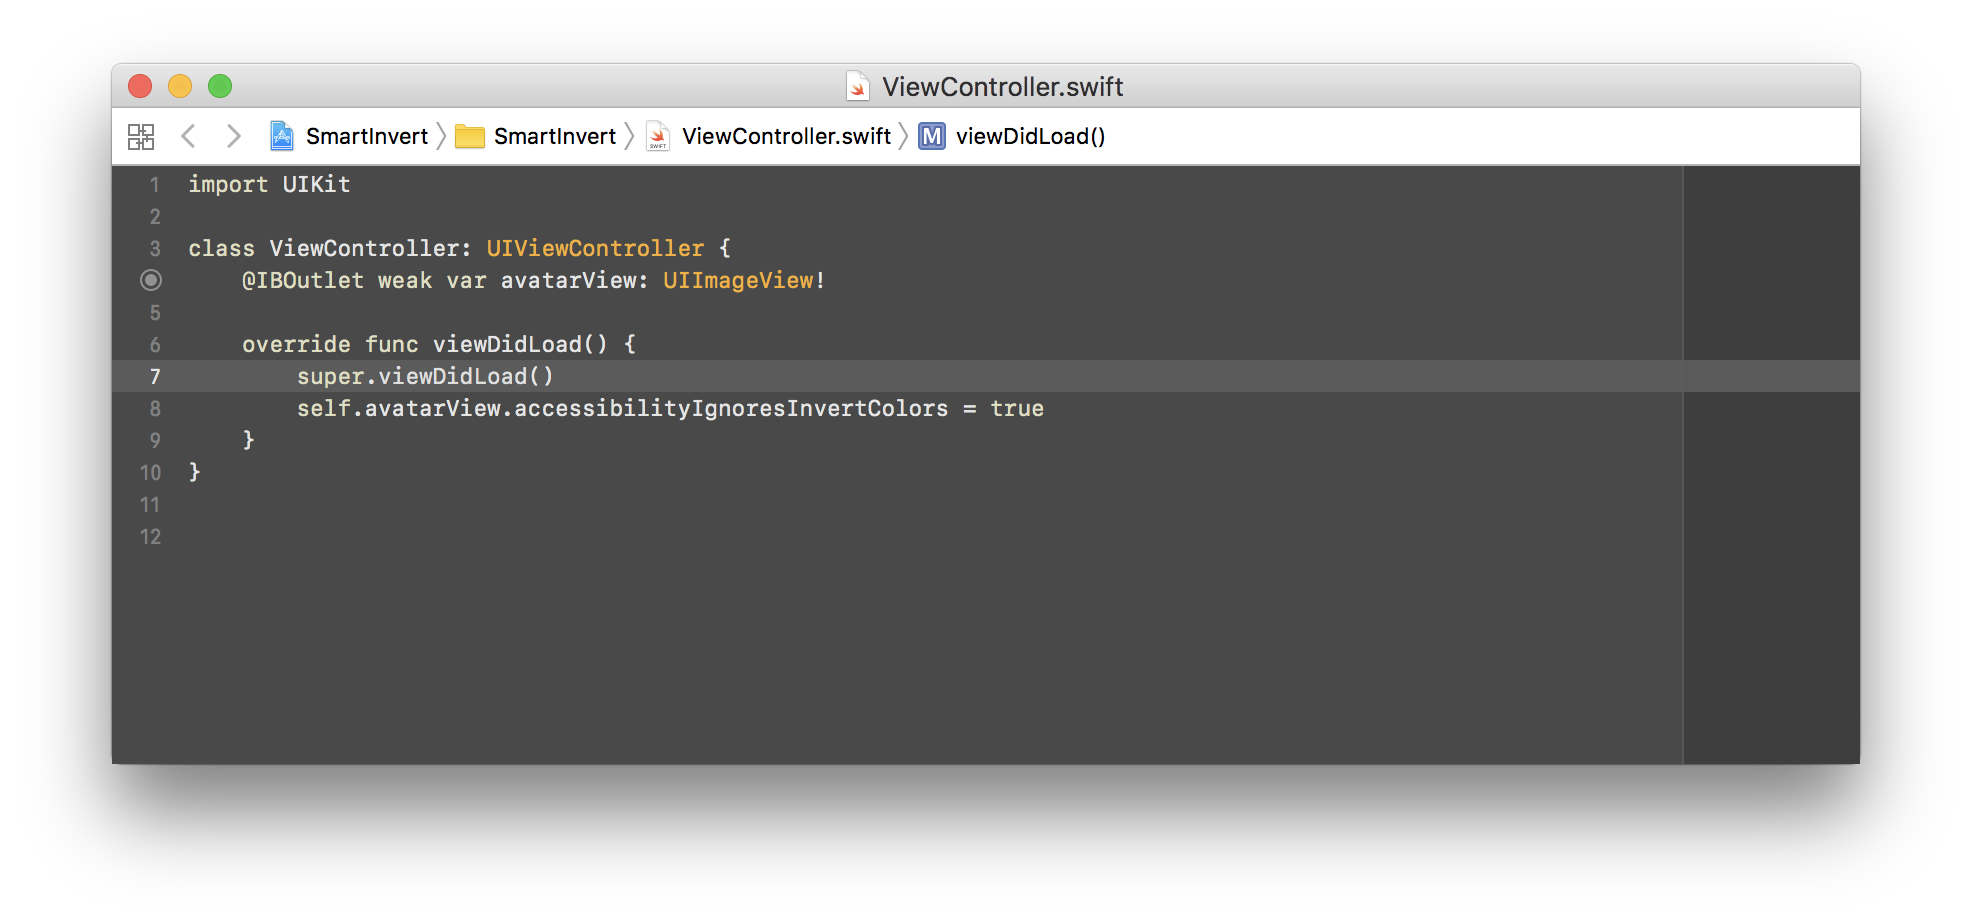
This gives us the desired effect for that view 🎉:
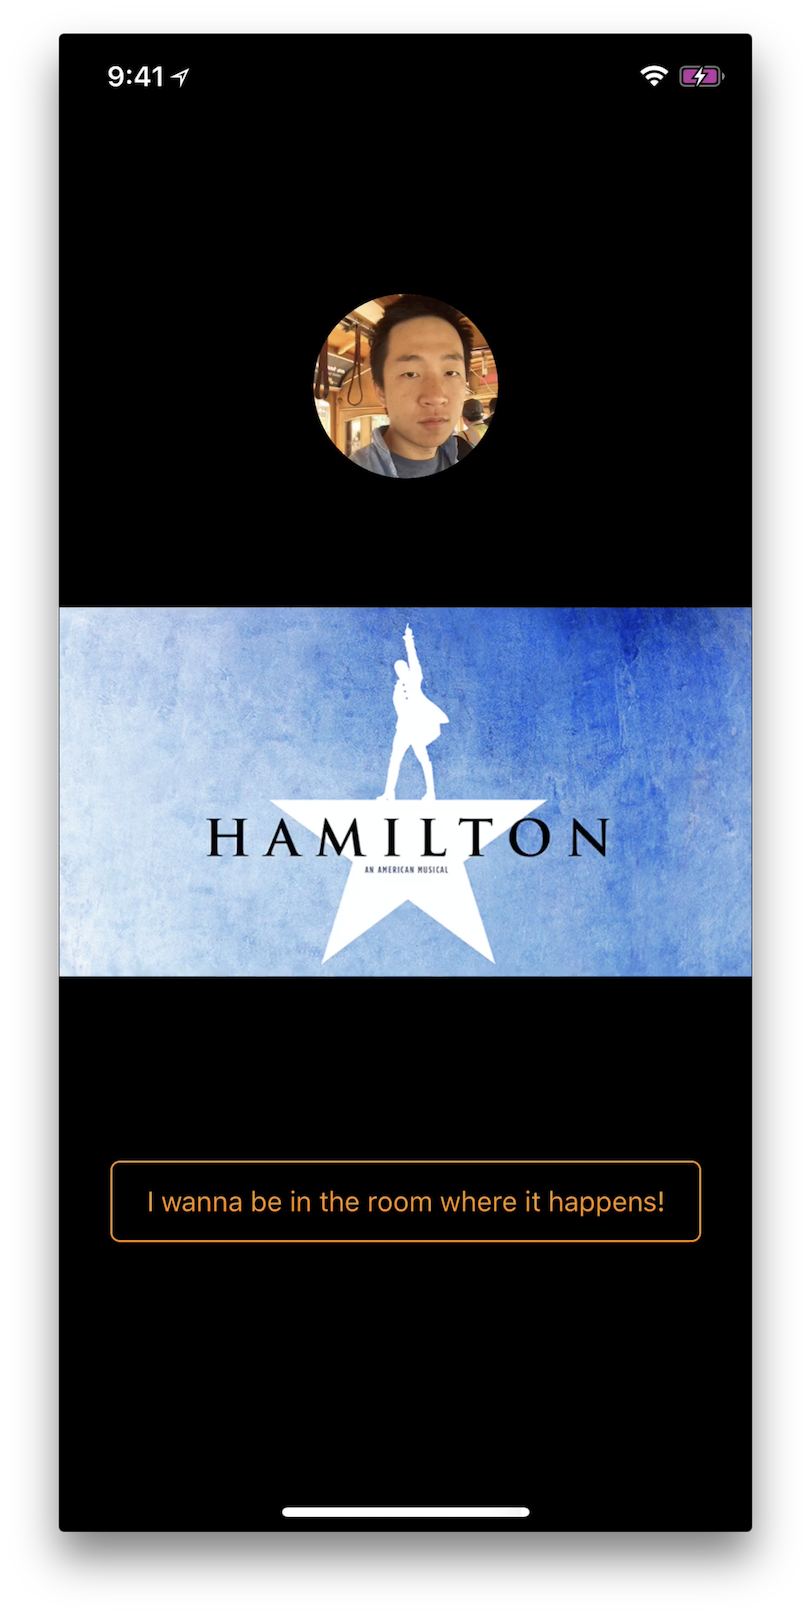
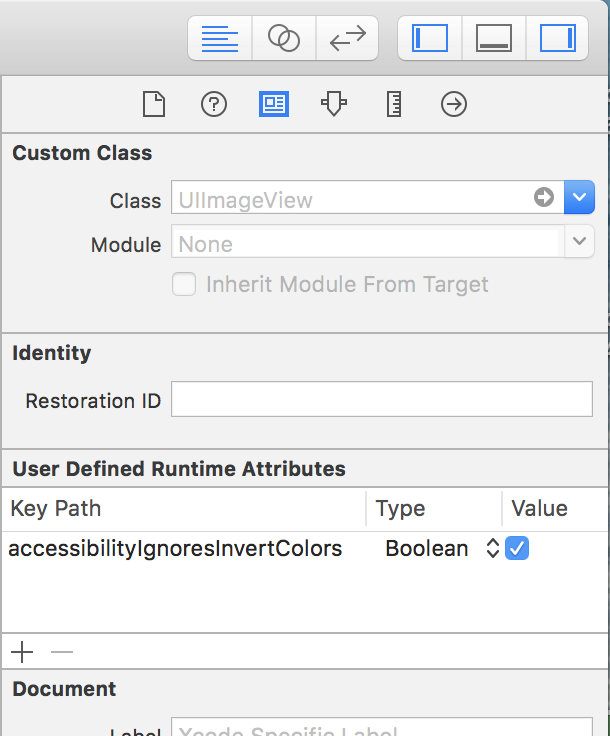
The same can be done in Interface Builder. Let's fix the other view by setting a runtime attribute:
Result:
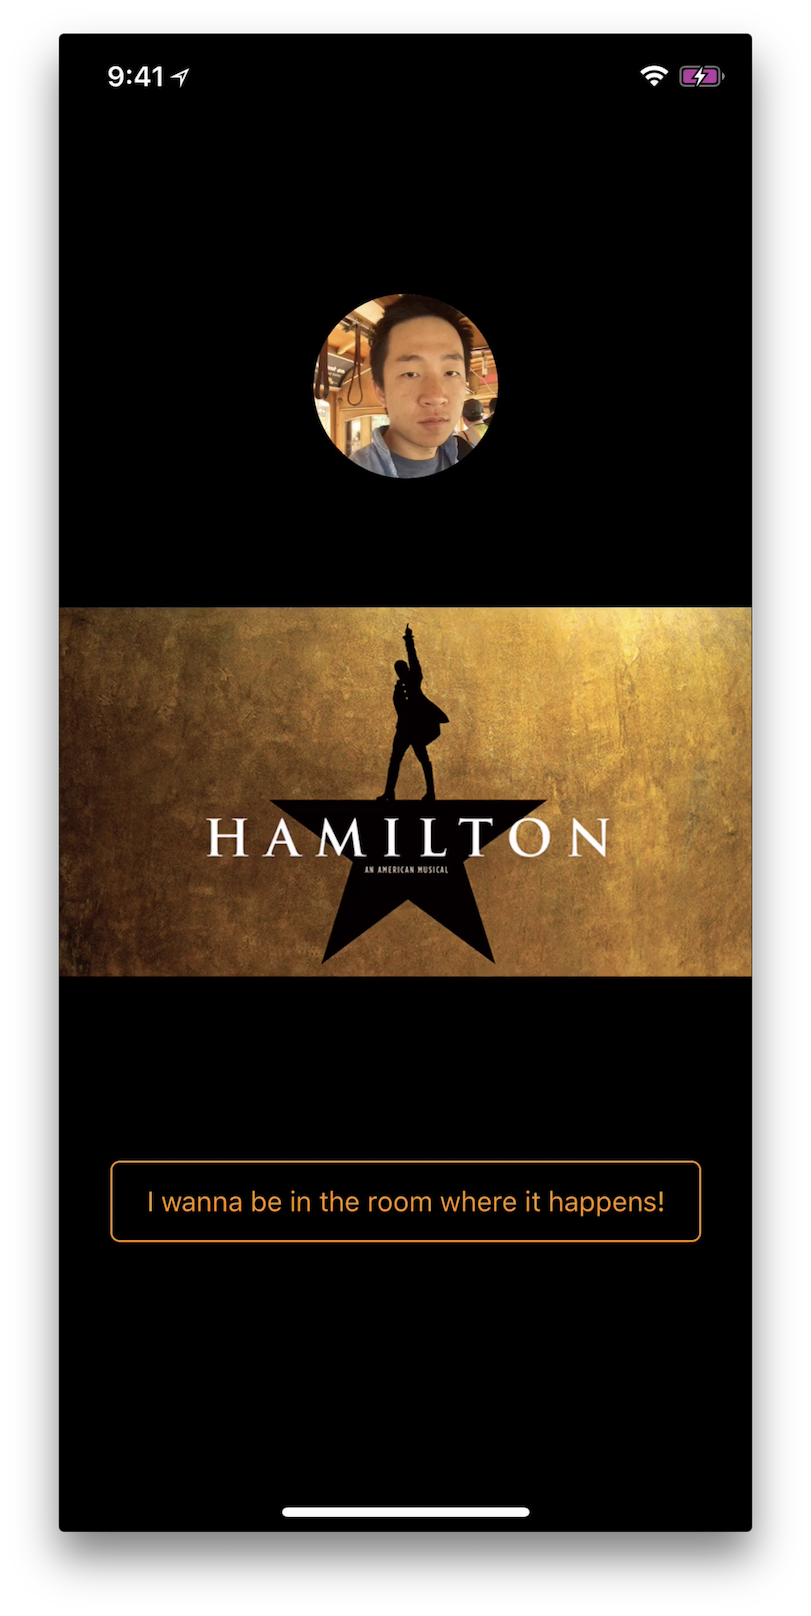
Tada!
Compatibility with older iOS versions
The story gets slightly complicated when your app need to run on older iOS versions. For one, our code won't compile:
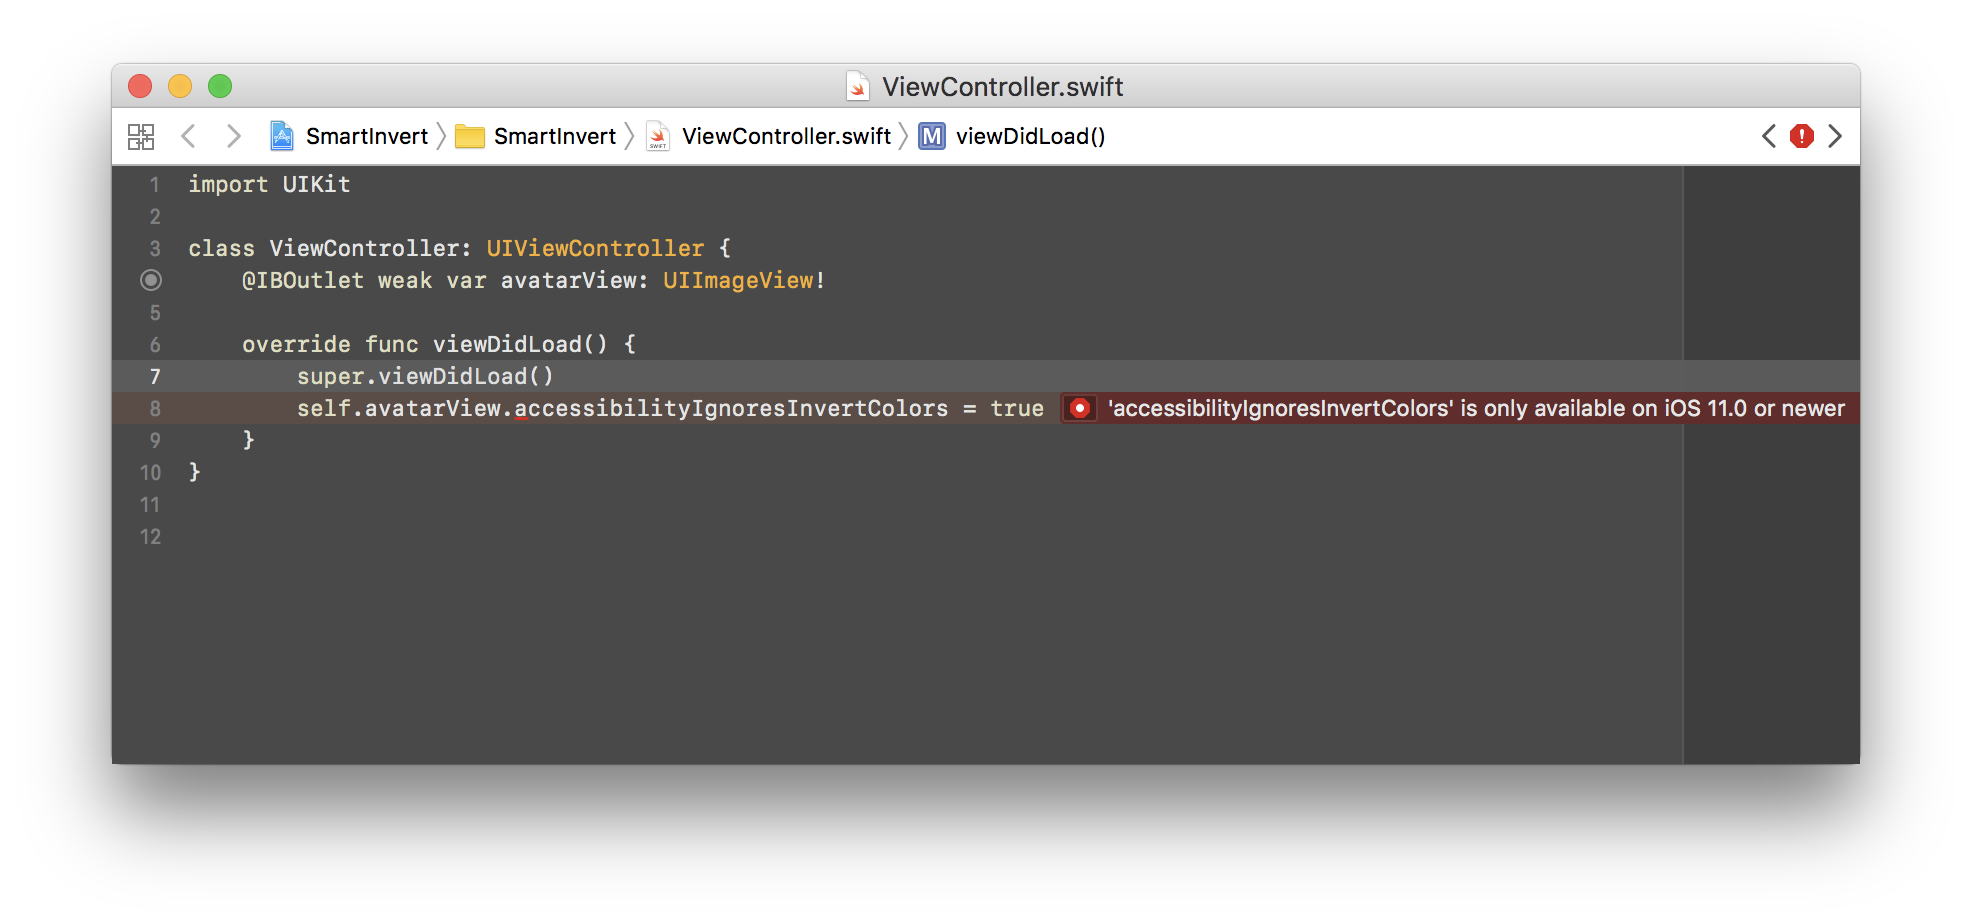
But that's nothing new to iOS developers, really. We can fix that with a #available:
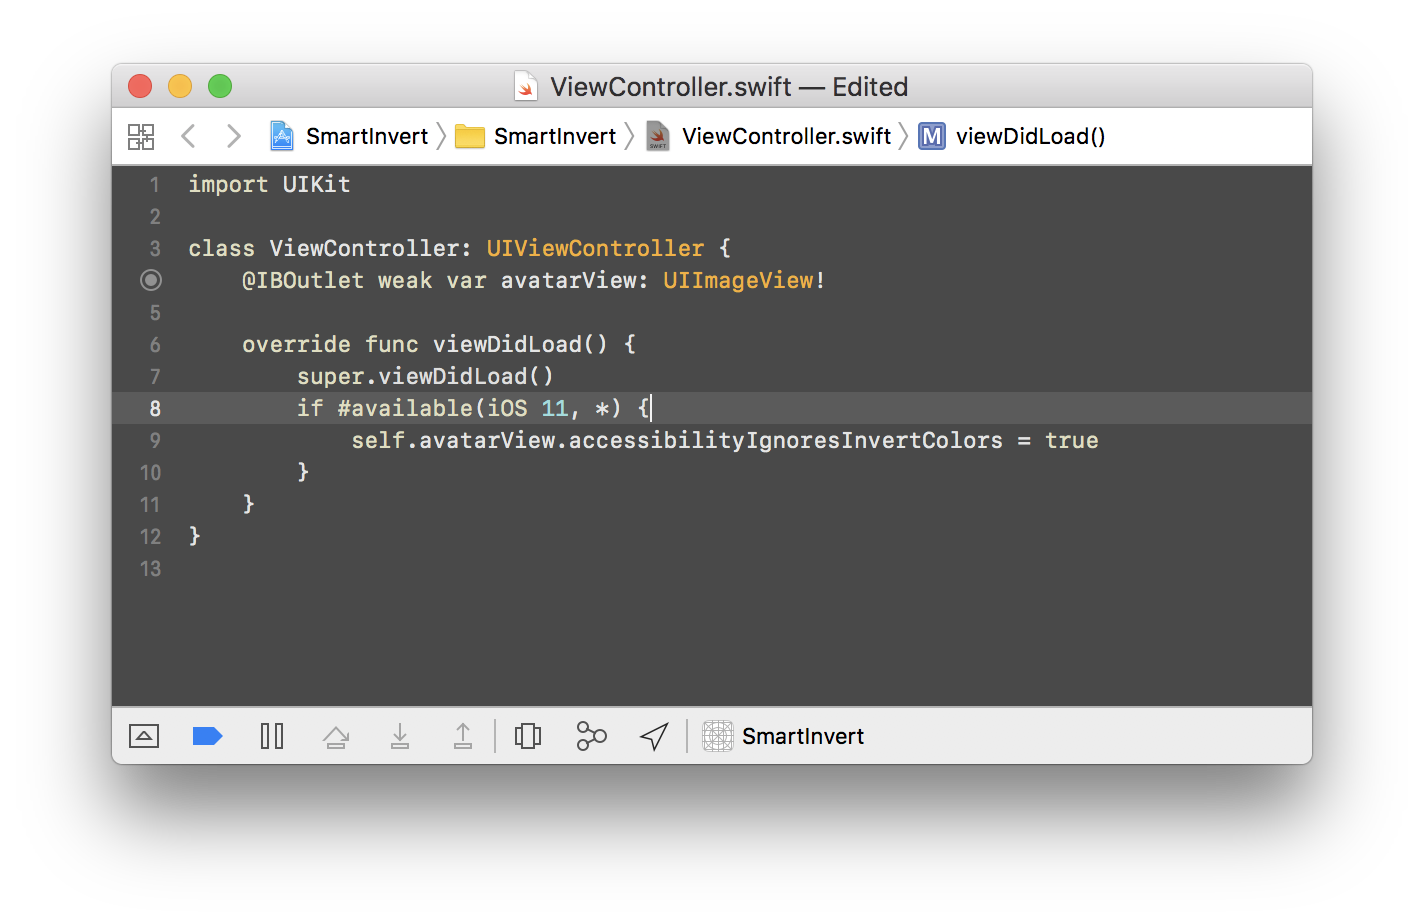
When you run the app in older iOS devices or simulators, Xcode will complain about our runtime attribute as well:
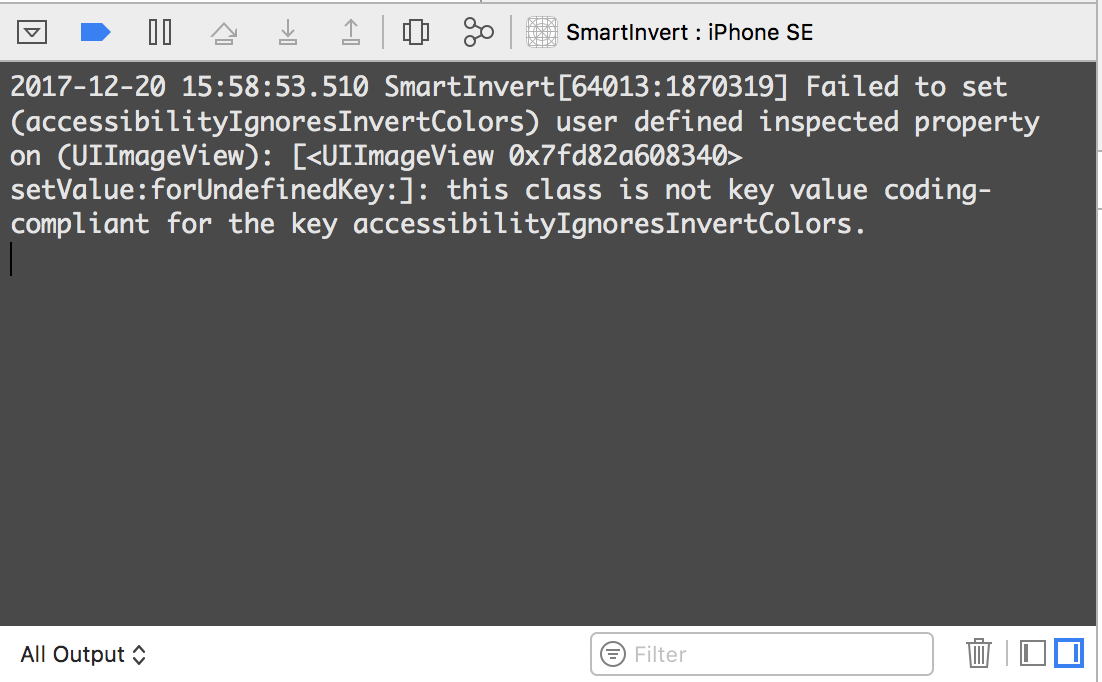
If that bothers you, I recommend writing your own wrapper for this property as an extension to UIView. To
put a cherry on top, make it @IBInspectable!
extension UIView {
    /// Whether or not to set accessibilityIgnoresInvertColors to true for iOS 11.
    /// For older OS, this value is false and setting it has no effect.
    @IBInspectable
    public var ignoreColorInversion: Bool {
        get {
            if #available(iOS 11, *) {
                return self.accessibilityIgnoresInvertColors
            }

            return false
        }

        set {
            if #available(iOS 11, *) {
                self.accessibilityIgnoresInvertColors = newValue
            }
        }
    }
}
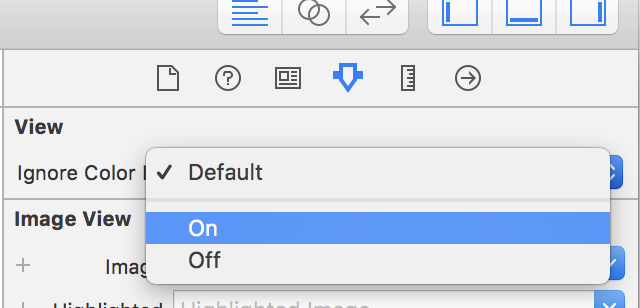
Having this snippet in the project, we set it in interface builder to any view with a couple of clicks:
How to screenshot with inverted color settings
Here's a bonus hint: screenshots taken on device won't have their color inverted even if you have the setting set to "on"! Go ahead, try it :).
To show off our handy work for supporting smart invert color, we'll need some other means to take screenshots. All screenshots in this article is taken using QuickTime on a Mac. So plug in your iOS device, open QuickTime Player, in menu select File -> New Movie Recording and select your device from the drop-down menu by clicking the arrow next to the record button:
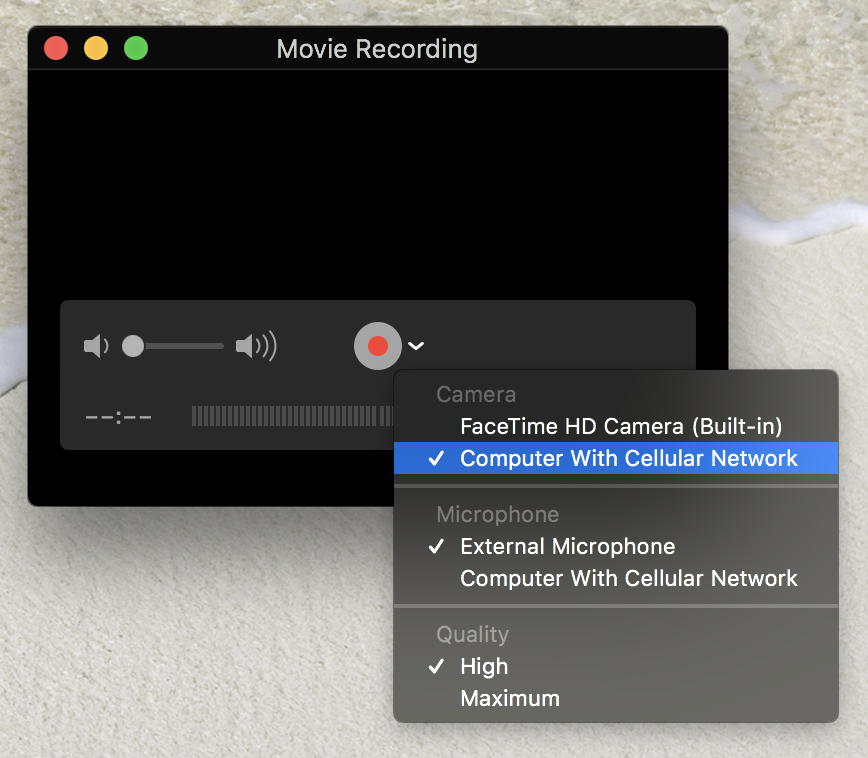
Now you can screen shot the QuickTime Player window the normal way.
Conclusion
You can download the sample project and play with it.
Smart invert is awesome and I personally wish all 3rd-party apps will update their apps for it as time goes on. If your favorite app (including your own!) doesn't support it properly, please consider informing the developer about accessibilityIgnoresInvertColors, or just send this article their way!